Fermented Honey Garlic — Water Activity Chemistry
Honey's aw of 0.6 meets garlic's allicin. Self-preserving. Zero salt.
Chad Waldman
Analytical Chemist · April 19, 2026
Prep
15 min
Ferment
4 weeks
Total
4 weeks
Servings
1 pint jar
Salt
None
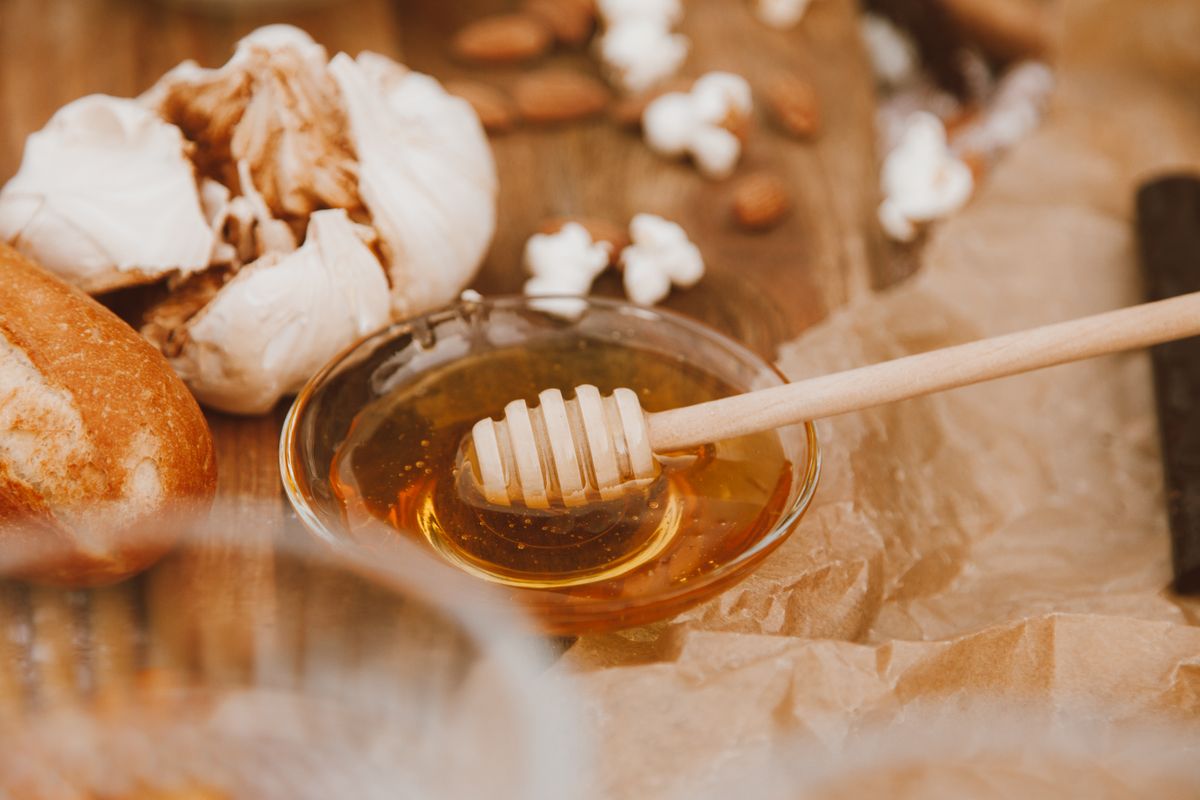
This is the ferment that breaks the rules. No salt. No brine. No pH calculation. Just honey and garlic in a jar — and the chemistry does everything else.
Here's what's actually happening: honey's water activity (aw) sits around 0.6, which is far too low for most pathogens to survive. When you add raw garlic, the cloves release moisture into the honey, nudging that aw just enough for osmotolerant wild yeast to wake up and start fermenting. You'll see CO2 bubbles within 48 hours. The honey slowly liquefies. The garlic mellows from sharp and pungent to something almost caramel-sweet with a faint tang.
The antimicrobial chemistry is layered. A 2023 review in the Journal of Ethnopharmacology (PMID: 37400003) identified honey's four key antibacterial components: hydrogen peroxide, methylglyoxal, bee defensin-1, and phenolic compounds. Garlic adds allicin — the sulfur compound responsible for its sharp bite — which a 2025 study in Food Science & Nutrition (PMID: 40746652) confirmed remains potently antimicrobial in fermented garlic-in-honey preparations. Two independent mechanisms. One jar.
I keep three jars going at all times. Different ages. The 6-month jar is liquid gold — dark amber, almost syrupy, with a complexity that takes something this simple into territory I can't fully explain. The garlic cloves are soft enough to spread. I put them on everything.
One safety note: use raw honey only. Pasteurized honey won't ferment — the wild yeast has been killed. Botulism spores are the real concern here since honey can harbor Clostridium botulinum, but a 2026 review in Foodborne Pathogens and Disease (PMID: 41159286) explains why properly acidified honey ferments are low-risk: the combination of low pH, osmotic pressure, hydrogen peroxide production, and bioactive compounds creates a genuinely hostile environment for pathogen survival. Flip the jar daily for the first week to keep garlic coated. Never feed this to infants under 12 months.
Lab Session
Fermented Honey Garlic — Water Activity Chemistry — Full Process
Instructions
 1
1Peel the garlic
Peel all cloves and leave them whole. Do not cut or crush them yet. A light nick or bruise is fine — it will actually accelerate the initial release of allicin and garlic moisture into the honey. Remove any papery skin completely.
Chemist’s note
Use the back of a knife to smash-peel quickly. Efficiency matters when you're doing 2–3 heads.
 2
2Add garlic to jar
Add the peeled cloves to your clean pint jar. Fill to about halfway — you want room for the honey and space for the ferment to expand slightly as CO2 develops. Pack them in loosely.
Chemist’s note
Dry the jar completely before use. Water dilutes the honey and can throw off the water activity balance.
 3
3Pour raw honey over garlic
Pour raw honey slowly over the garlic until every clove is fully submerged with at least a half inch of honey above the top clove. Raw honey is thick — give it time to settle down through the cloves. If any cloves float, that's fine. They'll sink as fermentation begins and the honey thins.
Chemist’s note
If your honey is crystallized, warm the jar gently in a bowl of warm water until it pours. Do not microwave — you'll kill the wild yeast.
 4
4Flip daily for 1 week
Cover loosely (not airtight — CO2 must escape) and store at room temperature, out of direct sunlight. Every day for the first week, flip the jar upside down and back to keep all cloves coated in honey and prevent any air exposure. You'll see bubbles forming around days 2–3. The honey will begin to thin and darken.
Chemist’s note
Set it somewhere you'll see it daily — next to the coffee maker, on the counter. Out of sight = forgotten ferment.
 5
5Ferment 4+ weeks
After the first week, slow down flipping to every few days. The fermentation will slow and deepen. At 4 weeks, the honey will be noticeably thinner, darker, and more complex. The garlic cloves will have softened and taken on a mellow, sweet-savory flavor. pH should be around 3.5–4.0. Check at week 2 and week 4. Store in the fridge after opening — it keeps for 6+ months.
Chemist’s note
Taste at 4 weeks, 8 weeks, and 6 months. They are three completely different products. The 6-month version is the one worth sharing.
The Science
Comprehensive review of honey's antimicrobial mechanisms — low water activity, acidic pH, hydrogen peroxide production, and bioactive phytochemicals — with specific analysis of botulism risk and safety protocols for vulnerable populations.
Foodborne Pathog Dis, 2026 · PMID: 41159286 (opens in new tab)→
Honey's antimicrobial activity stems from high sugar content, low pH, hydrogen peroxide, and methylglyoxal (MGO). These components synergistically inhibit biofilm formation and multidrug-resistant pathogens.
Future Microbiology, 2025 · PMID: 40293032 (opens in new tab)→
Honey's hydrogen peroxide and methylglyoxal effectively disrupt biofilms and combat multi-drug-resistant pathogens — with antimicrobial activity preserved in raw honey but reduced by thermal processing.
Antibiotics (Basel), 2025 · PMID: 40001416 (opens in new tab)→
Fermented garlic in honey (FGH) showed notable antimicrobial activity and the highest antioxidant capacity among processed garlic types. Fermentation enhanced flavonoid and phenolic content while retaining sulfur-compound bioactivity.
Food Sci Nutr, 2025 · PMID: 40746652 (opens in new tab)→
Honey's four key antibacterial components — hydrogen peroxide, methylglyoxal, bee defensin-1, and phenolic compounds — were identified as the primary drivers of its broad-spectrum antibacterial and anti-biofilm activity.
J Ethnopharmacol, 2023 · PMID: 37400003 (opens in new tab)→
Fermented Honey Garlic — Water Activity Chemistry
Honey's aw of 0.6 meets garlic's allicin. Self-preserving. Zero salt.
15 min
Prep
4 weeks
Ferment
pH 3.5–4.0
Target
Ingredients
Equipment
- 1 pint wide-mouth mason jar, clean and dry
- Loose-fitting lid or cloth cover (CO2 needs to escape)
- Small plate or tray (for drips during flipping)
- pH strips or pH meter (optional but recommended)